This is an excerpt from “Slöjd in Wood” by Jögge Sundqvist.
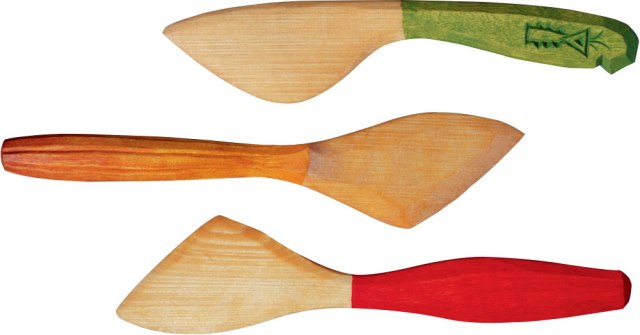
Carving a butter knife is a good beginner project. It may seem to be an easy object to make, but the design requirements require some reflection. A tapered handle with a thin blade is important to work well.
Tools required Axe, knife, drawknife (optional).
Material Juniper (Juniperus) is moisture resistant, dense and durable. Rowan (Sorbus) and maple (Acer) are excellent alternatives, as well as ring porous woods such as oak (Quercus) or ash (Fraxinus). My preference is to use birch (Betula) because it is convenient to make butter knives and spatulas from straight-grained leftovers from splitting green logs. It is also possible to split out blanks from naturally crooked blanks, if you wish.
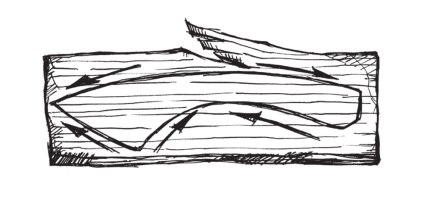
Make the Butter Knife Select a straight-grain, knot-free piece of wood approximately 25cm to 30cm (9-1/2″ to 11-3/4″) long by 10 or more centimeters (3-15/16″) in diameter. Split it right through the pith of the wood. From one half, use your axe to rough out a piece 5cm (2″) wide by 2cm (3/4″) thick. Hew carefully along the wood grain, working down the grain so you don’t split the piece apart.
It is important the handle fits the hand well
and the blade is thin and flexible.
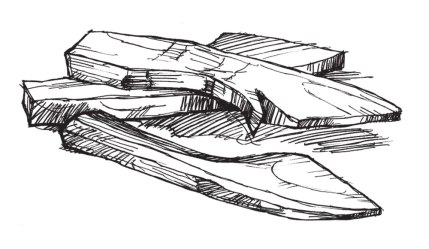
If you need to remove a lot of material, use the axe to hew relief or scoring cuts nearly to your line. Start at the bottom and work your way up the blank. Then come down with the axe to chop this waste away. Taper the handle gradually toward the blade. If you have access to a shaving horse, it is a good idea to use a drawknife to quickly shape the form and create even bevels, or you can use a knife. Taper the blade’s thickness from 6mm (1/4″) along the back to 3mm (1/8″) toward the edge. Feel the thickness with your fingers. A butter knife must be flexible or it will be too stiff to use. Cut or saw off the excess handle material and carve the bevels. The handle should be 16mm to 22mm (5/8″ to 7/8″) thick and have a total length of 170mm to 180mm (6-3/4″ to 7-1/16″).
CARVING AWAY FROM YOURSELF
Apart from the common elbow grip, there are some powerful and safe grips known as the power grip and the scissor grip.
Note that safety is important. The grips must be safe in your hand to give you the confidence to use the knife with the strength that is needed to cut through the wood. There are several tricks to get strength and controlled cuts, depending on the object you are making and the carving challenges.
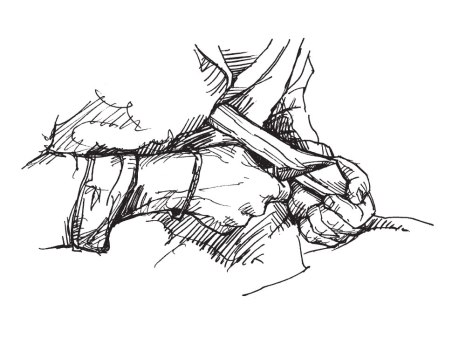
Power grip Hold the knife close to the blade. Drive the knife powerfully with a straight arm, without bending your elbow. Use the muscles in your shoulder and back. Lift your shoulder and carve downward with a smooth and firm movement. Tilt the tip of the blade upwards and skew the knife as you slice. The slicing action is from the handle toward the tip. Be sure that the bevel is riding on the wood. The concave bevel is supporting the cutting edge. This is one of the most common grips.
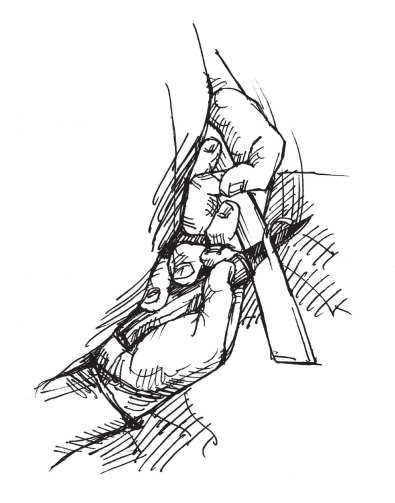
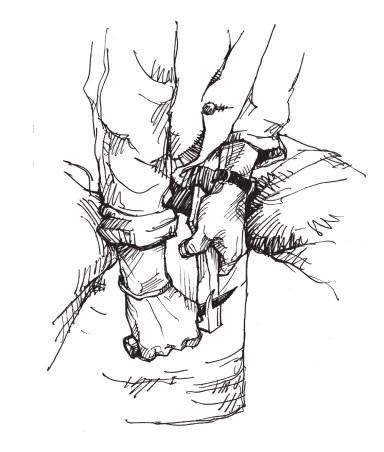
Scissor grip This is a grip providing good strength and, above all, control. Hold the knife in your hand with your palm facing upward and with the edge facing outward. Be sure that your thumb is on top of the handle. Take the material in one hand and the knife in the other, forming a pair of scissors in front of your chest. Curl your shoulders in a little and press your hands to your chest. Start the cut from the base toward the tip while you pull both the blank and the knife.
Slide your forearms along your body and feel how your shoulder blades and your shoulders pull back. This action helps your forearms to lever the cut, using large muscles. Press your knuckles onto your body. It is a combination of pulling the blank and slicing with the knife that makes the cut. If you want to make short stops, for example in the transition between the bowl and stem, press your knife hand firmly to your body, adding friction to stop. This is a strong grip.
CARVING TOWARD YOURSELF
Pull grip Hold the far end of the blank with your off hand and support it against your chest. The thumb of the knife hand rests on top of the handle and the tip of the knife is tilted away from the body. This way the base of the thumb hits the body before the knife releases from the wood. To provide safety, tuck your forearms against your ribs. Pull the knife toward your body and let the edge run from base to tip. While pressing and sliding with the forearm of the carving hand toward your chest, your wrist remains stiff. Press the bevel into the wood while you carve. This provides good support and a nice surface.
FINISH
Decorate and paint the handle with linseed oil paint, but don’t paint the blade or you will paint your food! Once the paint is dry, place the spatula blade in linseed oil and soak for a couple hours. The linseed oil must be foodgrade – raw, cold-pressed and sun-thickened. (In the U.S., food-grade linseed oil is usually labeled as flaxseed oil.) Wipe off the excess oil with a rag or paper towel. Dispose of oily rags properly.
— Meghan B.