The following is excerpted from Derek Jones’s forthcoming book, “Cricket Tables.”
Simplicity, necessity and ingenuity are the three key principles for making cricket tables. This traditional three-legged table exists in a variety of forms and woods – no two are the same. So making them follows an organic process – your tools and materials dictate your approach and your cricket table’s final form. Jones introduces the form, then teaches you the simple skills to create a variety of everyday furniture with a few basic hand tools and easily sourced materials.
We’re nearing the finish line on this one, and it will soon be off for a copy edit, then to press. You can sign up now to be notified when it’s published.
It’s no coincidence that every new paragraph in this chapter refers to the concept of a reliable datum, and if you prepare stock and build items on your bench it makes perfect sense for that piece of equipment to be flat. Level is also good but not nearly as important as flat. As this chapter is about establishing habits that result in better workflow, I’m not going to explain blow by blow how to flatten a benchtop; that information is well documented and easy to find. What I will say is, make sure you make it part of your regular workshop housekeeping regime. You’ll find it nigh on impossible to plane something flat if your bench isn’t that way first, and as for assembling anything square? Forget it.
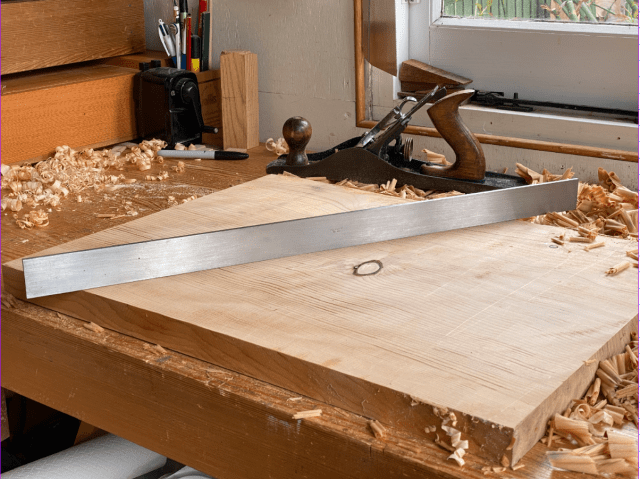
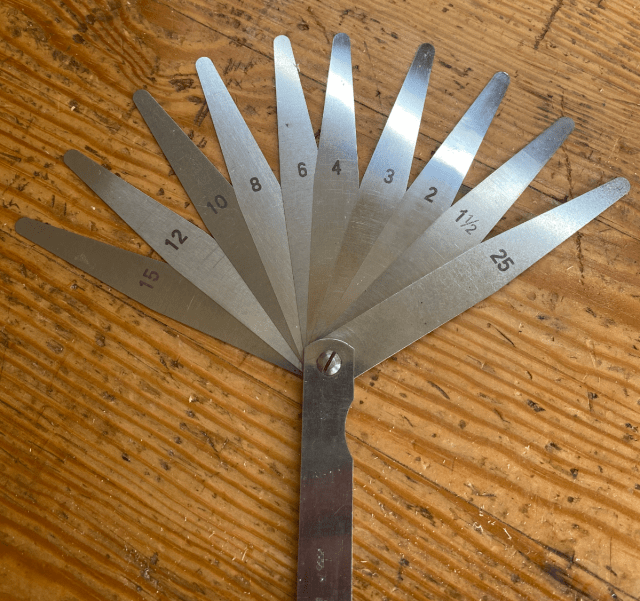
Regular check-ups are the key to a healthy benchtop and with a square-edged straightedge, you just place it on edge and look for gaps between the benchtop and the straightedge. Hopefully that’s fairly obvious. Now let’s assume you’re using a plane to flatten your benchtop. Wouldn’t it be a good idea to make sure your plane is also flat before making any adjustments? Fortunately you’ve got the right tool for the job but this time rather than rely on a visual inspection you can introduce one of those senses I mentioned earlier, touch, and for that you’re going to need a set of feeler gauges. You can pick up a perfectly adequate set for less than $5 or pay 10 times that amount for a precision ground set but for woodworking, “adequate” is all you need. Feeler gauges are thin strips of metal calibrated to specific thicknesses, contained in a wrap-around case. A good starter set might include blades from .002″ (0.05mm) up to .036″ (1mm). To use them, you select a blade to slide between the straightedge and whatever it is you’re calibrating where there is a gap. Note that you may not be able to see the gap itself.
To check the sole of a metal-bodied plane for flatness set the lever cap pressure as if you were about to use it and then retract the blade. Similarly, if you’re checking a wooden-bodied plane, set the wedge and blade to a pressure suitable for use. Turn the plane upside down and support as much of the body as you can. Unlikely as it sounds, a large plane such as a No. 7 can flex if only supported at each end. Shorter planes are less likely to, but supporting it close to the middle will give you the best reading. I wouldn’t recommend clamping your plane in a vise unless you are absolutely certain the jaws come together either parallel or with a top edge bias. If you’re comfortable with this, be sure to position the body low down in the jaws so the force is being directed through the sole and not just across the sides.
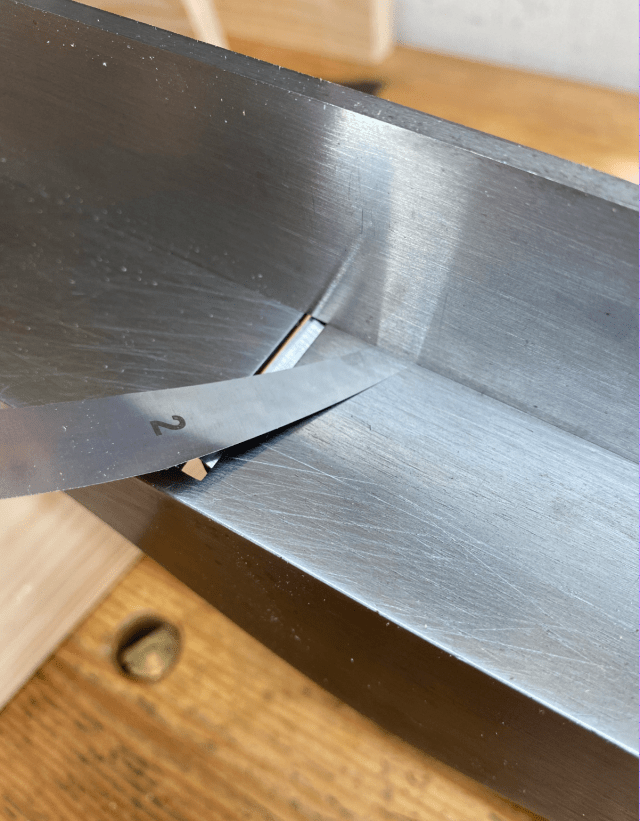
Now place the straightedge along the length of the sole and look for any gaps. Having a raking light helps. If you can see light between the two, select the nearest-size feeler gauge and see if you can wiggle it into the gap without causing the straightedge to move. Keep inserting thicker blades (singularly and not stacked) until you meet with resistance that’s likely to topple the straightedge. The only place where a gap is desirable is directly behind the mouth. Anywhere else and you have a problem. Readings will vary depending on the size of plane you’re testing but an acceptable reading for a No. 5 jack plane can be 0.002″ without seriously affecting your work. The same reading on a longer plane suggests that it is flatter given that the deviation is spread over a longer distance.
It’s worth mentioning that in engineering terms what you’ve carried out is pretty crude compared to the checks carried out in a commercial manufacturing facility. In truth, there’s little comparison – but for woodworking and for less than $120, what you’ve achieved is perfectly adequate but more important, repeatable.