Rhett Fulkerson of Nice Planes in Frankfort, Ky., showed me a cool trick for setting a chipbreaker quickly, precisely and perfectly parallel to the cutting edge.
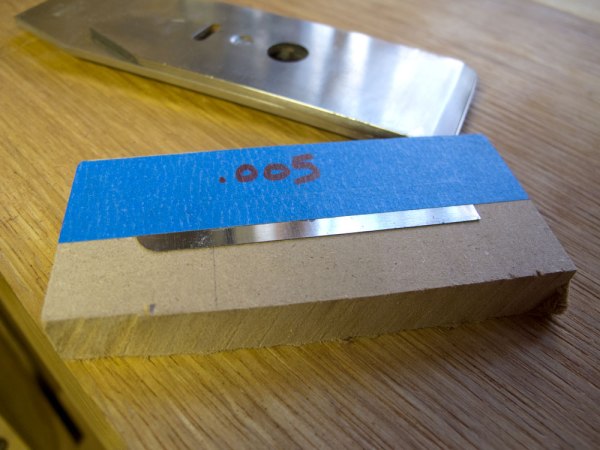
Take a feeler gauge whose thickness is equal to the distance you want to set the breaker back from the cutting edge. In this example, I used a .005” feeler gauge. Tape the feeler gauge to a flat surface.
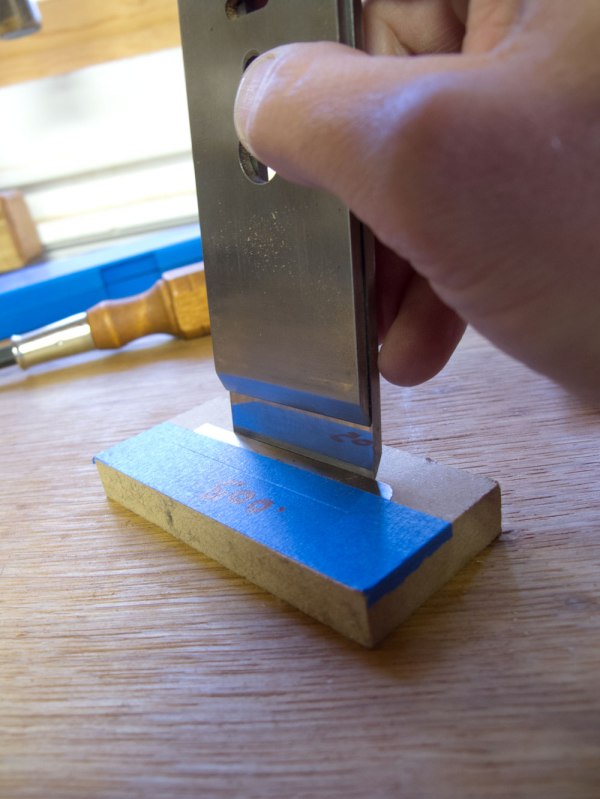
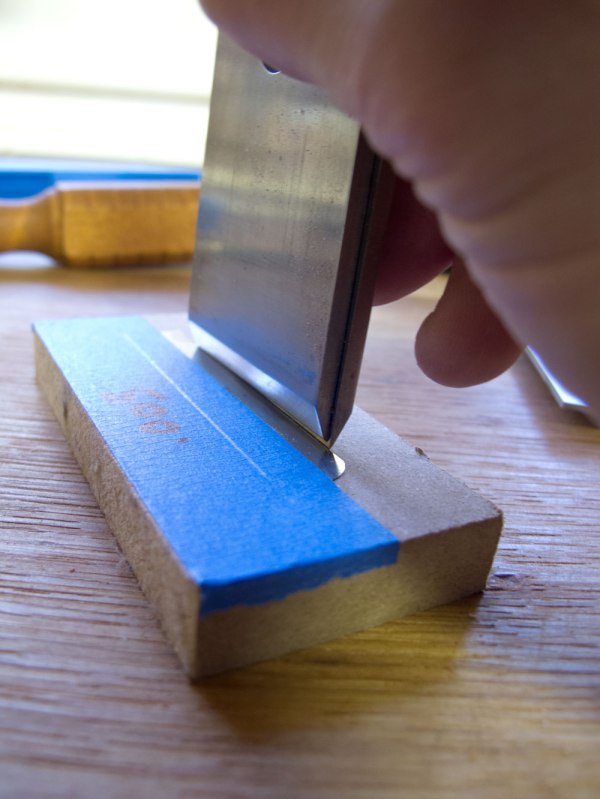
Touch the back of the iron to the flat surface and against the edge of the feeler gauge. Slide the breaker down the back of the iron until it contacts the feeler gauge. If your iron has a curved cutting edge, apply the downward pressure in the center of the iron and the breaker.
Tighten the breaker’s screw. You are done.
Rhett showed me this trick during the Lie-Nielsen Hand Tool Event in Cincinnati, Ohio, this weekend. I also got to check out his planes, his plane kits and his new irons and chipbreakers that you can use to make your own wooden handplanes.
The O1 irons and breakers are very nice. The breakers have a machined lip like the improved chipbreakers found on Lie-Nielsen and Veritas chipbreakers. So the parts precisely on the back of the iron.
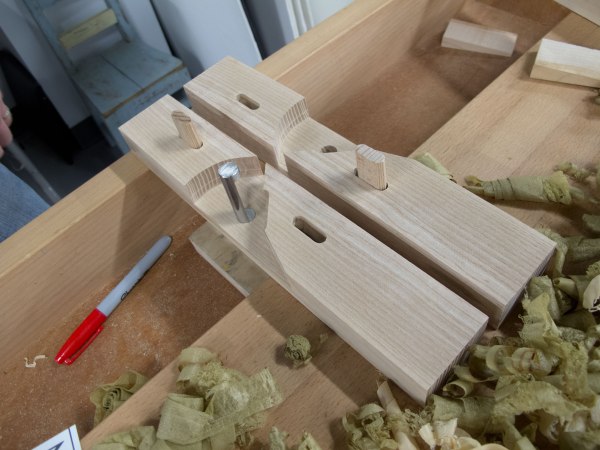
His plane kits in maple are also sweet. Thanks to pre-cut Dominos in both halves of the plane body, it is almost (almost!) impossible for the parts to shift as you glue them up. If you are looking for a plane kit, this is a very good one.
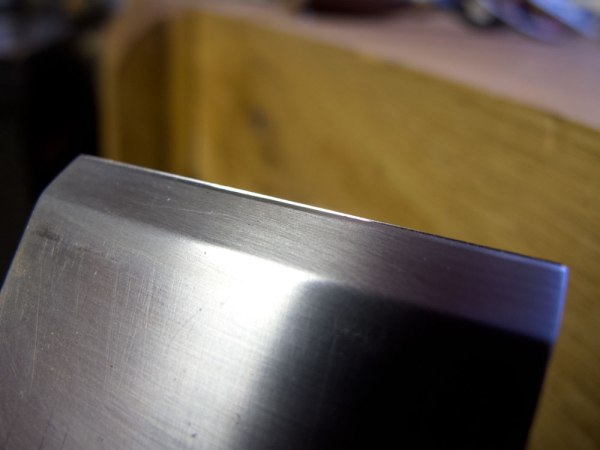
And his finished planes are excellent as well. Since I first saw Rhett’s planes, they have become sleeker and more comfortable in the hand. Definitely check out his site if you have any interest in wooden planes.
(Note: His site says his company is Nice Ash Planes. He recently dropped the “ash” as he started using other woods.)
— Christopher Schwarz
