This is an excerpt from “Make a Joint Stool from a Tree” by Jennie Alexander and Peter Follansbee.
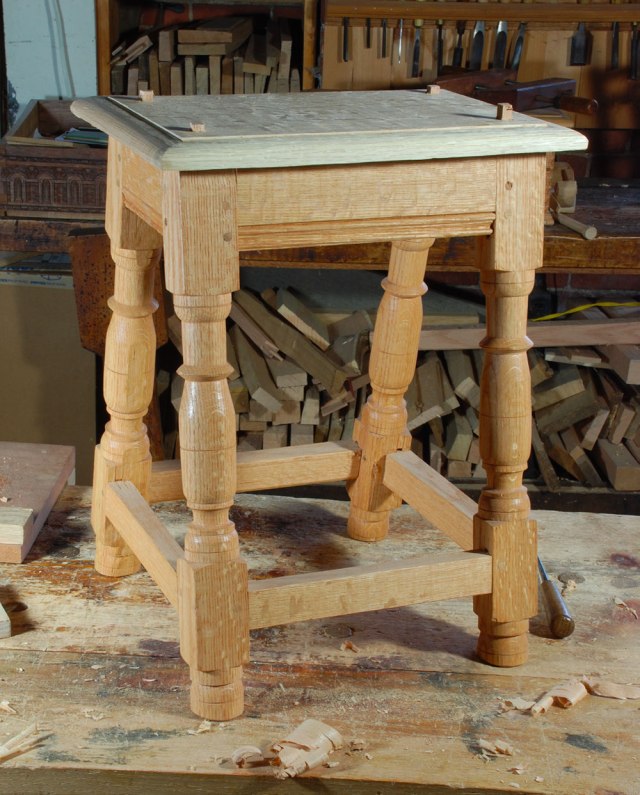
Now to fasten the seat to the stool’s frame. By this point, you have checked that the top of the frame and the bottom surface of the seat are both flat. If either needs correction, now’s the time. Once that’s been checked, position the seat in place. You can get this pretty close by eye and feel and then make fine adjustments based on measurements taken with a ruler. If it looks all right, then it is all right.
At this stage, Follansbee departs from period methods and uses a handscrew to clamp the seat in place for boring. We have often speculated and tested different methods for how period joiners might have held the seat in place.
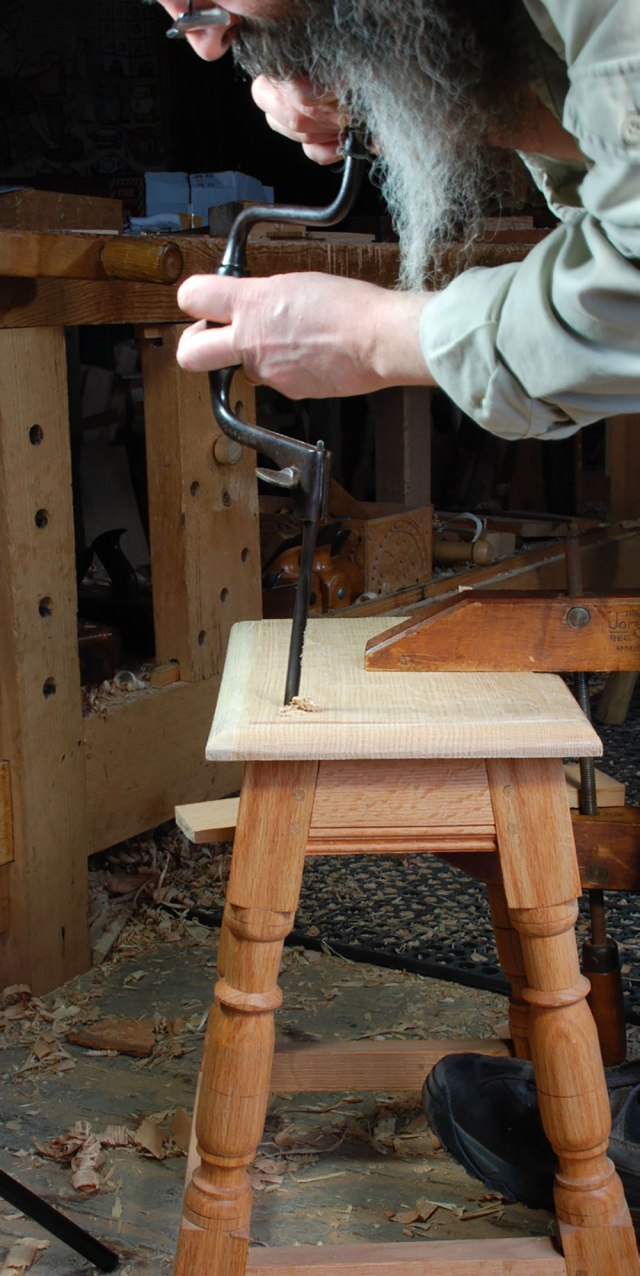
Alexander has come up with a method that avoids the modern clamp. First, secure the seat with two cut nails, driven down through small pilot holes bored into the seat and stiles. These nails are set into diagonally opposite stiles. They must be angled to follow the rake of the stool’s frame exactly where the pegs will be. Don’t drive them all the way in; you need to be able to pull them out and replace them with the square wooden pegs. Once the nails hold the seat down, bore holes in the other two corners and drive those oak pegs in place. Now pull one nail, bore the peg hole and drive a peg home. Then remove the final nail, and repeat.
For most stools, we bore the holes so the square pegs fix the seat to the stiles. Some stools have pegs driven into the rails instead. Both methods work. Sight the holes in line with the stiles, aiming for the area between the joints – it turns out to be a small target. Align the brace and bit to bore at an angle close to that of the end frame of the stool. This way the pegs are pinching the seat down. Sooner or later, someone picks a stool up by the seat, and if the pegs are driven straight down into the stiles, then the seat can come off. Use a larger bit than you did for the pin holes in the joinery. We try for about 3/8″ diameter.
Bore one hole, peg it and then bore the next. The pegs are fashioned in the same way as the pins that secure the mortise-andtenon joints, except for one critical thing – these are square with essentially no taper. They must fit as tightly as can be, without being so tight as to split the stile. Drive some into test holes to check their size.

Work your way around the stool, boring and pegging each corner as you go. Hold the peg firmly while hammering. Any errant blow can split the peg apart. Best to have the shop quiet, so you can listen to the sound it makes. When the sound deadens, the peg is home. Trim it .” or more above the seat then hit it again. Sometimes the peg can go just a bit more, and being trimmed short makes it less likely to shatter. The peg needs to fill the entire hole; there should be no gap beyond the faces of the peg.
If you have time, leave the pegs proud of the seat and come back in a day or two and hit them one more time. Then trim them with a backsaw and chisel to pare them flush with the seat. Next, take one or two more passes on the seat itself with a very sharp plane set to take a light shaving. To hold the stool for this step, you can jam it against the front of your bench with your hip and plane it. Or stand it on the floor, and step on a stretcher to keep it from jostling about.
— Meghan B.