An Excerpt from “The Woodworker: The Charles H. Hayward Years: Volume II” published by Lost Art Press.
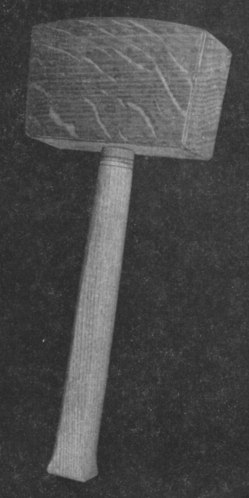
The mallet is one of those tools whose shape and form we accept without question until an alternative is brought to our attention. In the opinion of many who have used both types, the German pattern is preferable to the generally accepted British mallet.
The designers of the latter went to great pains to make the tapered shaft in order that centrifugal force should tighten the head in use. The continental designers decided that what is good enough for a hammer head is good enough for a mallet head. Possibly in England in earlier days the general carpenter or cabinet maker had no access to a lathe and so evolved this type of mallet. The German pattern, however, relies upon a bored hole, a turned handle, glue, and wedge.
As most readers already possess a mallet, two alternative sizes are given. The first figures produce an average sized mallet suitable for general work. The figures in brackets are for a lighter model. Mallet shafts are invariably too long. Many workers will prefer a shaft as short as 7-1∕2 in. (compare with the carver’s mallet, handle length about 5 in.). Though beech is the traditional wood for the head, other hardwoods, both British and imported, will give many years of wear. Oak and ash are both suitable. The handle on the other hand ought to be of straight-grained ash, or better still, hickory.
The head is made first, the angles sawn and the hole bored. Preferably a pilot hole of about 1∕8 in. diameter is put through first, boring from both sides. The twist bit will then follow through easily. Bore a similar hole in a piece of thin ply and thread this on the tail centre of the lathe.
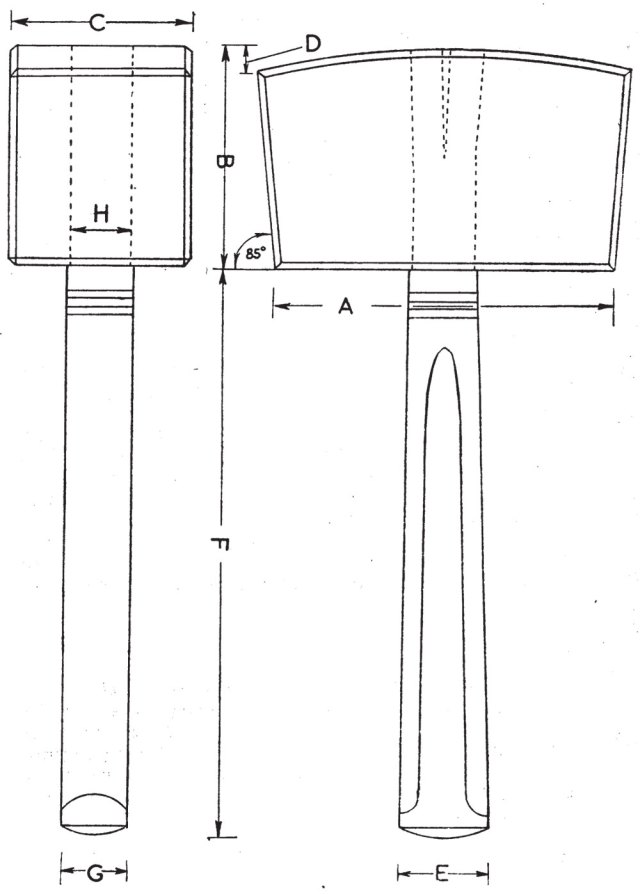
Centre the handle, still rectangular in section, and turn down the end nearest the tail stock to fit the plywood gauge tightly. An extra length of 1∕8 in. should be allowed to project beyond the head. The remainder of the handle is then turned to shape with gouge followed by chisel, a rather bumpy operation, but a good finish can be obtained with no great difficulty. The smallest shoulder should be turned on the shaft to fit against the head. Before cutting off a little individual embellishment may be added. This is particularly useful in a communal workshop where several such mallets may be used.
Slot the handle for the wedge or wedges which are made from the waste at the driving centre end. Open out the mortise either for two wedges with a tapered auger such as ladder makers use, or for one wedge with a suitable gouge or a small rasp to give an oval hole on top. Glue preferably with synthetic resin glue. Cramp up with a sash cramp. The plywood gauge is a useful cramping block to allow pressure to be exerted on the head after the shaft has poked through it. Now hold the shaft upright in the vice and check that the head is parallel to the vice jaw. This must be corrected quickly if required. Drive in the wedge or wedges and recramp until dry.
Plane off the projecting wedges and the handle. The top may be left square as it now is,or it can be curved as the drawing shows. The shaper tool produces this shape easily and quickly with a good surface.
A small bevel on all the edges prevents splitting and a coat of clear cellulose or french polish keeps grubbiness at bay.
— MB