Part 3 of a British Introduction to Japanese Planes
This is the third in a short series on Japanese planes. I am doing this to get to the bottom of an interesting, very simple but highly developed tool for creating polished surfaces.
My son plays rugby with Harry Hood. Harry’s parents have this exquisite oak drop-leaf dining table. The surface of which is highly polished but has never seen abrasive paper. As the evening sun comes in low through the window you see the plane strokes across the tabletop. Wide, smooth, with no tear-out, straight-ish. You can see someone who “knows his onions” who really knows how to do this, has made that tabletop, fast and well.
This is what we are looking for. The answer will be partly in the timber, air-dried and mild, partly in the setup of the plane and partly in the hand that wields it. I can get 90 percent there now, it’s this last bit that drives me nuts. Europeans have used metal planes for only the past 120 years; I wonder if the old sharpened steel wedge in a block of wood can do a better job?
I am typing this with lacerated thumbs gained from careless handling of Japanese plane irons. I thought that 35 years experience of sharpening would have protected me, but no. WATCH OUT. We are now onto Sharpening, a subject that has had more wordy nonsense written about it than almost anything I can recall.
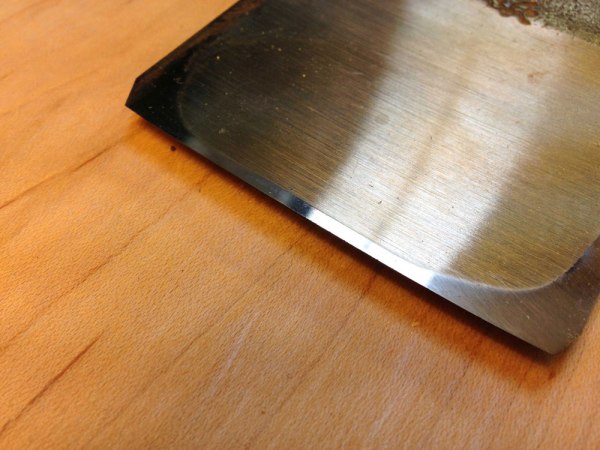
Let’s begin with definition. A really sharp edge is the junction of two polished surfaces brought together in such a way that LIGHT FROM A SEARCHING RAY OF SUNSHINE WILL NOT LAND UPON THAT EDGE. The light in this situation will pass either side; the edge is just too sharp to allow light to land there. You test your edge with your eyes – looking hard, searching for that glimmer of light on the edge that betrays it. Turn the blade this way and that, find the light, examine the edge. If you see NOTHING on that edge, hooray. IT’S SHARP. A fine dusting of sparkles tells you it’s not sharp. Or not sharp enough for me.
We Europeans sharpen differently to the Japanese. We create a polished back like they do; they make this easier by hollowing out the back of plane irons and chisels so all you are flattening is the outer edges. The front bevel we grind, then hone a micro-bevel at the cutting edge. We do this to save time. The Japanese hone the whole bevel and they proudly display the laminated steel exposed by their honing.
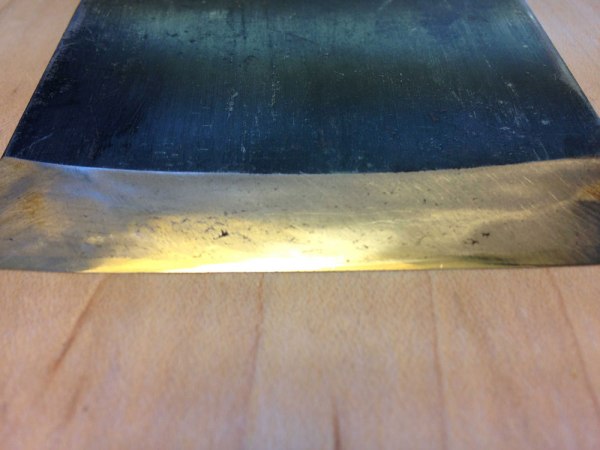
Laminations are partly to make honing easier again. The hard cutting edge is forge-welded to a softer iron.They like to use pre-World War II anchor chains for this as it has a different, softer, quick-sharpening structure compared to modern steel. Look out for a steel with small black flecks in it. It’s very highly prized in Japan, but not here.
To hone these blades I went “their way” and worked the whole bevel. The bevel should be pretty flat to sit well on the stones. But some of them were not. I have now bought a small collection of planes and irons some 40 years old as well as couple of “new old stock” planes which have been in a store but unsold for up to 30 years. The old stock have some evidence of minor rust damage and light degrade, but if you choose the right one it seems to be the way to go. I have enjoyed having tools set up by skilled makers much my senior. They each tell me part of the story of how to do this, but there are a few small problems.
A “new old” blade takes me a few minutes of well-practiced work to set up, an old one may have come from a skilled and much-revered grandfather. Or, and you don’t really know what you are getting on eBay till it’s too late, from a less-than-careful sake-sodden owner whose careless workmanship leaves you with a tool needing a full half a day to get sharp.
Honing demanded a careful sensitive touch. No place here for those dreadful honing guides. You hold it in your hands and work it on the stone. First, get the stone flat, really flat. We use a granite slab with #180-grit wet/dry paper. Put some water on the paper, then rub the stone on the wet/dry paper. You know it’s flat when the surface is an even colour.
Holding the blade with the bevel flat on the stone and working back and forth without rocking and changing the angle takes care, a light touch and lots of slurry. Use the Nagura stone that comes with some high-end stones to help clean the stone and create a polishing paste.
This “going through the grits” is essentially polishing. We start with #1,000 grit to turn a burr, but go through #3,000, then #6,000 and on to #10,000. General sharpening might skip #3,000 and #10,000, but we are being careful here. We are a Japanese waterstone workshop; most of our stones are manufactured by King or Ice Bear. We have stayed with this method because it is fast efficient and relatively inexpensive.
This last qualification is changing now as we are now starting to use natural mineral stones imported from Japan. They are very, very interesting, and I will talk about these another time.
Watch your thumbs. Mine were cut quite badly not once but twice when wiping the blade clean, something I have done routinely every day but probably not with edges like this.
— David Savage, http://www.finefurnituremaker.com