I’m sure you’ve heard this: What separates a good woodworker from a great one is his or her ability to hide mistakes.
Which is complete and utter crap in my opinion.
The really fantastic woodworkers I have worked with don’t make many mistakes at all. What they do encounter – like all of us – are times when the material fails. A weak spot in the grain breaks off or a tool encounters something unexpected in the wood.
These problems do require repair, and that is a good skill to have.
While there have been books and articles written about repairing woodwork, I’ve found them lacking. Usually the “mistake” was created by the person writing the article. So it usually requires a simple and straightforward fix.
And that is rare in the world of woodworking.
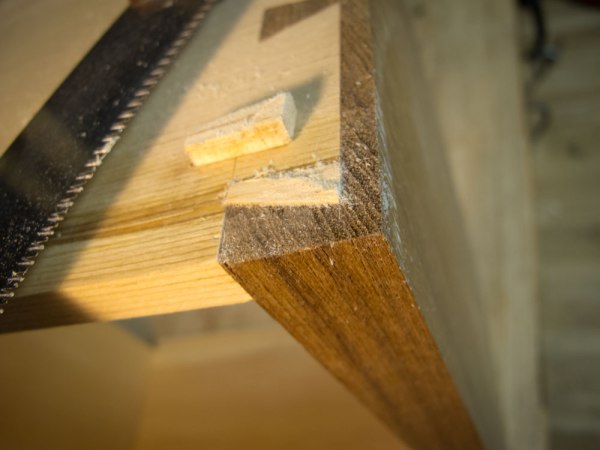
So here is a real-world repair I had to make last night on the campaign chest I’m building. After about 160 dovetails in the case and drawers, I was assembling the final joint when a corner of one of the tails disintegrated.
The joint was perfect enough. The wood was unexpectedly weak because of a resin pocket in the pine.
The bad news was that the part that crumbled went missing into the shavings. The good news is that I wouldn’t have wanted to use it anyway.
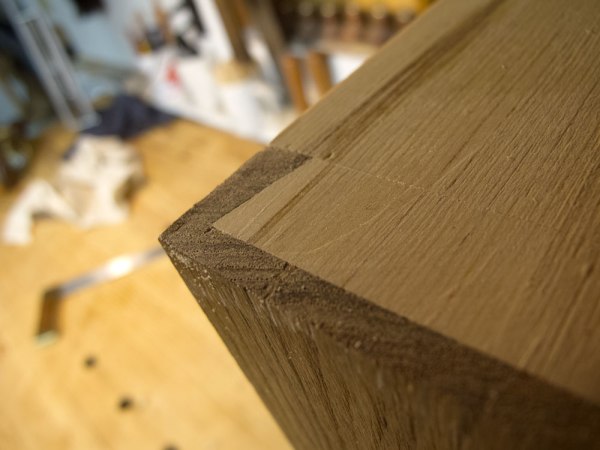
Step. 1. Stabilize the existing wood. I cut away anything that seemed loose or could be crumbled away with my thumb.
Step 2. Make a surface for joinery. Using a chisel, I cut the wounded wood until it was a regular rabbet. I measured the width of the rabbet at both its wide and narrow ends.
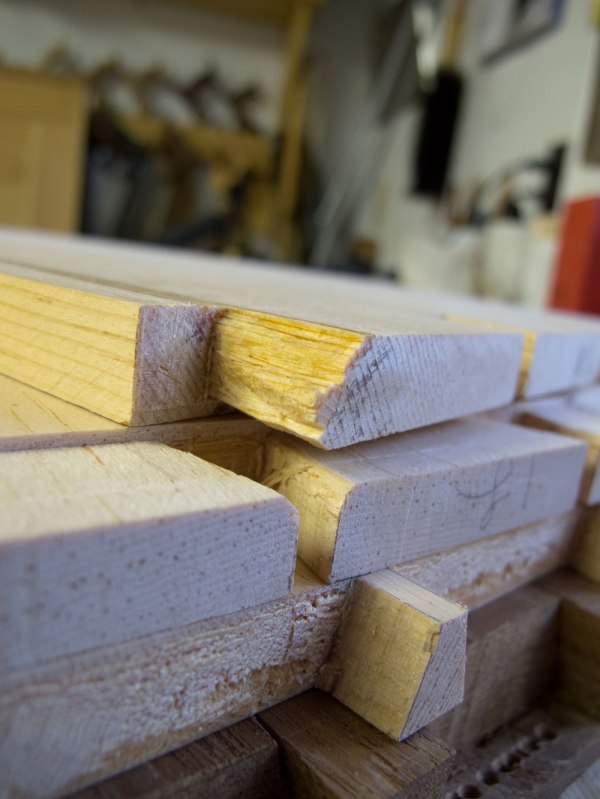
Step 3. Make a patch. Using the drawer’s pin board as a template, I drew in the shape of the patch I needed on a piece of scrap pine. Then I sawed out the patch and smoothed the part with a block plane.
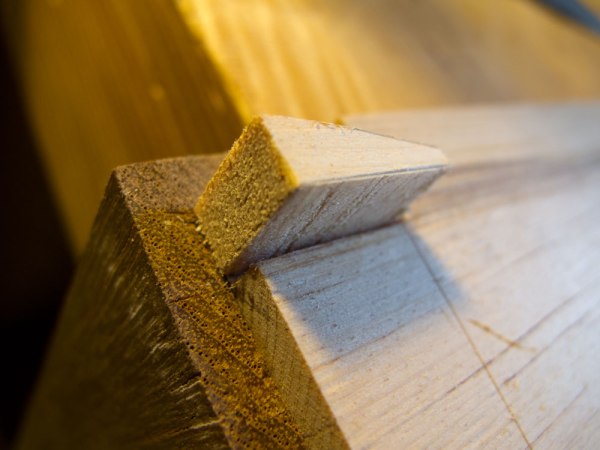
Step 4. I glued up the drawer without the patch. Then I glued the patched in place, driving it in with a mallet. Finally I sawed and planed the patch flush. Right before I finish the piece I’ll draw in some grain lines to imitate the pitch – probably with a sharp permanent marker (orange ink).
— Christopher Schwarz