This is an excerpt from “Carving the Acanthus Leaf” by Mary May.
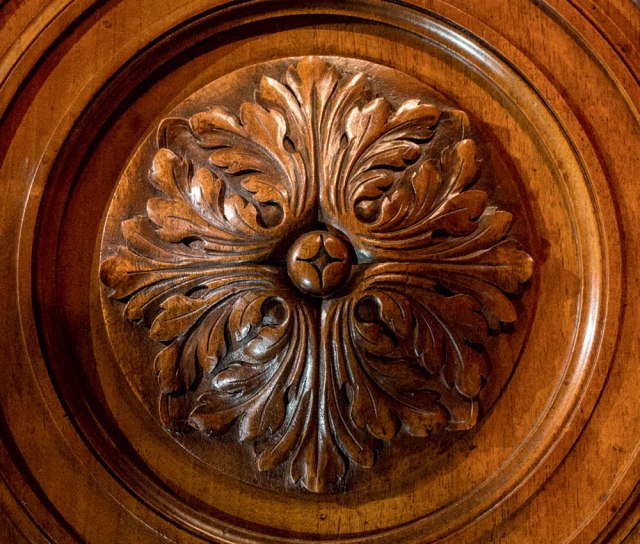
Various styles of rosettes have been used since the Roman Empire as decorative accents and are often used as appliqués (applied to a surface) to adorn furniture and architectural features.
Here are some of the design elements for rosettes:
• They are symmetrical and can be circular, oval, square or rectangular.
• There is a small bead in the center that is either plain or carved.
• In oval or rectangular designs, this center bead is also oval.
• Square or round rosettes that are symmetrical can be turned on a lathe before carving to establish the basic profile.
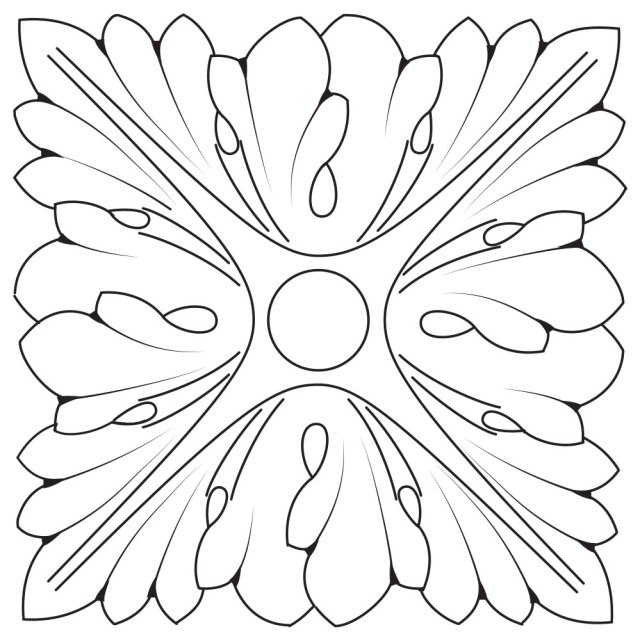
• There are typically four primary leaves evenly positioned around the rosette.
• The leaves start at the center bead and flow outward toward the edge, with the tips of the leaves defining the outer edges.
• For square or rectangular rosettes, the tips of the leaves end at each corner.
• The midribs or center stems get narrower as they reach the ends of the leaves.
• They often have small, secondary leaves that are between and appear to be positioned under each primary leaf. This example does not contain these secondary leaves.
HOW TO DRAW THE LEAF
This design has similar structural elements to other leaves, but some details, such as positioning the eyes, will need to be visually located without guidelines.
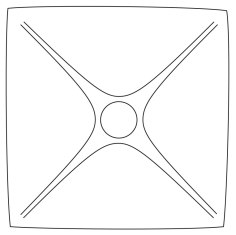
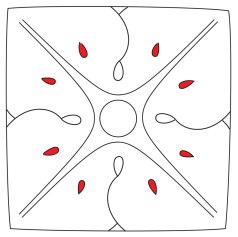
STEP 1: Draw a square. This example has slightly curved edges. Draw the center circle and the midrib (center stem) of each leaf ending just before each corner. Notice for this design that the midrib connects from one leaf to the next. This is often done to create a continuous flow between the leaves.
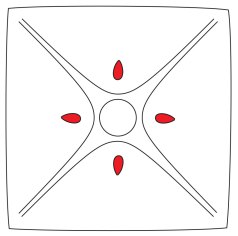
STEP 2: Draw the eyes close to the center circle. These eyes represent where two leaves overlap.

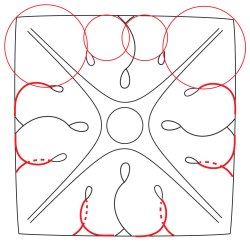
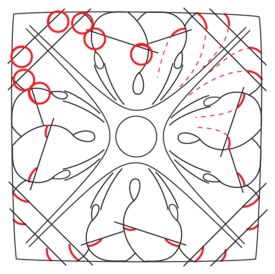
STEP 3: Draw eight circles as shown that intersect and slightly overlap at the pointed end of the eye. These locate the edges of the overlapping lobes.
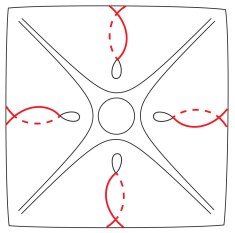
STEP 4: Erase the parts of the circles that are no longer needed. The remaining lines should extend from the pointed end of the eyes. The dotted lines represent the edges of the lobes underneath.
STEP 5: Erase the dotted lines. Draw the two eyes on each leaf about a third of the way up the leaf at a slight distance from the midrib.
STEP 6: Draw circles as shown that represent the overlapping secondary lobes. The edges of these lobes should extend from the eyes drawn in STEP 5. The dotted lines represent the parts of the lobe that are underneath. Sometimes drawing the edges of the lobes first can help locate the eyes, so steps 5 and 6 can be reversed.
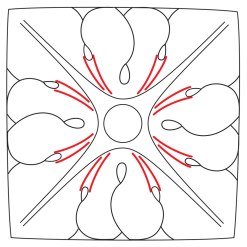
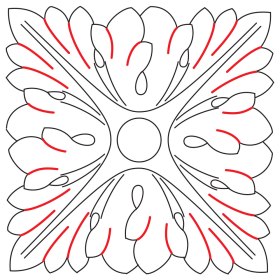
STEP 7: Erase the dotted lines. Draw the pipes that start from the eyes drawn in STEP 5 and curve and flow them alongside the midrib.
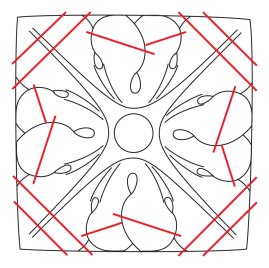
STEP 8: Draw the lines that locate the serrations as shown. These are typically positioned perpendicular to the center veins on each lobe, but in this design there are no center veins on the side lobes. Draw these lines at an angle located approximately halfway between the eyes and the tip of each lobe. Note that the center lobe has two of these guidelines that are perpendicular to the midrib. After learning how to position the serrations in the next few steps, these lines are usually no longer necessary as guides.
STEP 9: Take a deep breath. It really isn’t as complicated as it looks. Draw small circles that locate the serrations along the edges of the leaf. These lines should start at the edge of the leaf and curve down to meet the guidelines drawn in STEP 8. The dotted lines show the correct direction of the curve. These circles are simply used to show the curvature of the serrations. Erase the parts of the circles that are not necessary. This process of drawing the circles is often not necessary after learning to understand the shape and position of these serrations.
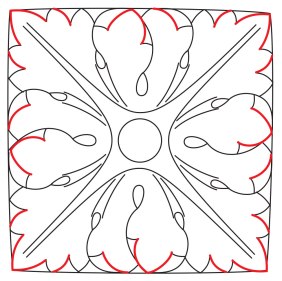
STEP 10: Erase all lines that are no longer needed. Complete the edges of the leaf by connecting the serration lines as shown and also complete the tips of the leaves.
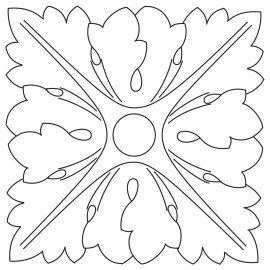
STEP 11: Erase any unnecessary lines.
STEP 12: Draw lines starting from the inside corners of the serrations that flow down each lobe. These lines represent a high edge (or high corner) in the leaf.
— MB