This is an excerpt from “By Hand and Eye” by Geo. R. Walker and Jim Tolpin.
The lifeblood of craft has always depended on knowledge passing from one generation to the next, and I struggle finding words to convey the importance that classic orders played. This is an opportunity to walk in the footsteps of thousands of artisans gone before you, a chance to learn things that cannot be put into words, because this leads into a room in your imagination. The classic orders aren’t about memorizing some nifty proportional recipes. In fact, it’s the furthest thing from recipes. It’s about learning to see. The physical act of drawing challenges the mind to reshuffle and see things anew. Try not to approach this like you’re learning a task or skill; instead just immerse yourself in this rite of passage. Have some fun with it, and let the ancients knock down the cobwebs and pry open some windows in some long-forgotten play space in your imagination.
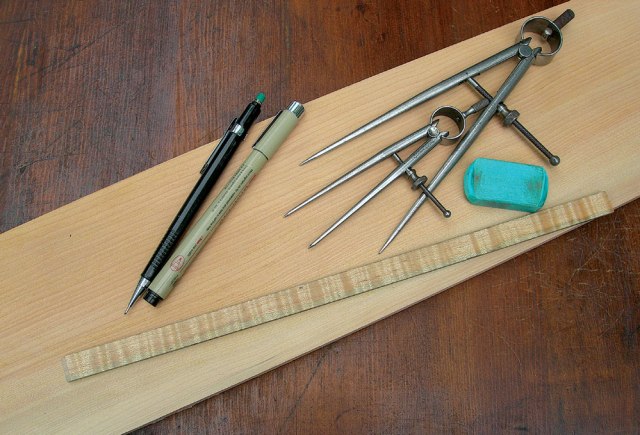
Grab a clean pine board about 8″ wide and 3′ long for a canvas. If (when) you botch the first attempt, simply plane or sand to reveal a new surface for another go. Pencil in all your lines then, after the entire drawing is complete, go back over your pencil lines with a marker. Think of it like a maze or a puzzle that will change the way you think and make new connections in your imagination. I encourage you, as always, to do this with pencil and not a computer to make sure you get the most direct connection between the portal of your hand and inner eye.
A word about scale. Because you will be drawing a relatively small image, some of the details will be too awkward to draw with a compass. For elements such as moulding profiles or the finer points on the capital, draw a separate detail sketch in larger format with a compass. Once you have completed the larger sketch, go back and hand sketch those details in. You’ll be pleasantly surprised by how well you can freehand sketch once you have the boundary of the form established and little practice on the larger detail drawings. This has real value in furniture design, also. For example, a volute is a delightful form to work into a design, yet because of scale, almost always requires drawing freehand. Generating a volute with a compass will inform your freehand attempts. Also because of scale, don’t attempt to use geometry to draw the entasis (slight convex bulging) on the upper two thirds of the column, just draw a straight taper.
In this drawing exercise you will render a Roman Doric order based on James Gibbs’ “Rules for Drawing the Several Parts of Architecture” (circa 1732). There are five orders – Tuscan, Doric, Ionic, Corinthian and Composite – that exist in an almost endless number of versions and varieties to draw and explore.
A few points about communicating proportions using arcs. One common way to show how a proportion relates to another element is to use a half-circle or quarter-circle to indicate a connection. Typically, a half-circle extends a mirror image proportion along the same line. Conversely, a quarter-circle mirrors a proportion from one element to an adjacent element but from horizontal to vertical (or vice versa).
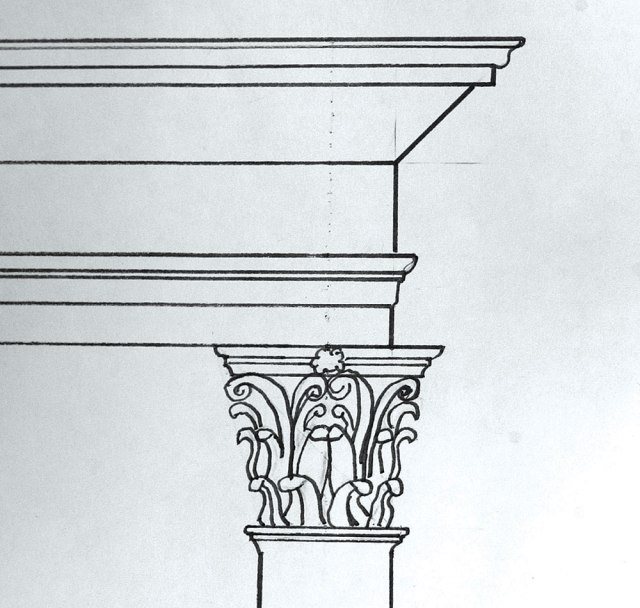
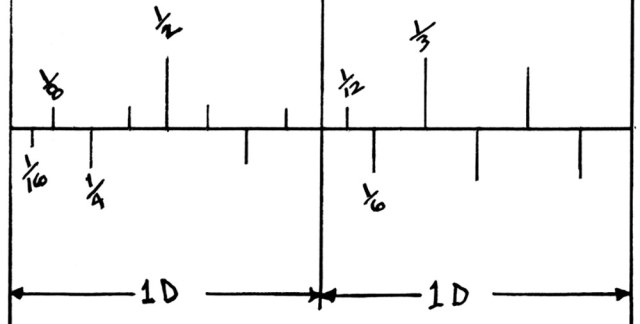
Start by organizing the form (Doric order) into its major vertical parts: the beginning, middle and ending, better known as pedestal, column and entablature. Draw a vertical centerline and establish the top and bottom of your drawing with a pair of horizontal lines, leaving yourself a few inches of margin above and below. Use dividers to step off these major elements and indicate their boundaries with horizontal lines. Once you establish the height of the middle (column) you can determine the module. In the case of the Doric, divide the column height into eight equal parts. That’s the diameter of the shaft near the base and also, therefore, your module. Now – and this is important – draw a small module key in the space below your drawing. Many of the elements that follow will be simple divisions of the module, for example, the column-base height is a one-half module, so having this key handy will speed up the drawing process. To create a key, draw a horizontal line and mark off two modules end-to-end using vertical hash marks to highlight them. Then use your dividers and, through trial and error, step off one module into halves, quarters and eighths. Then step off the second module into thirds, sixths and 12ths.
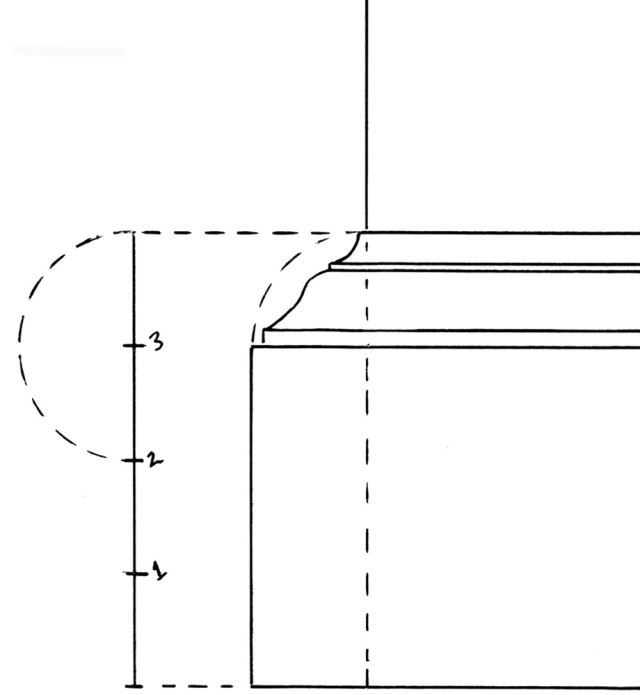
Start with the largest divisions and work down to the smaller details. Once you have established the overall column height and diameter of the shaft at the base, there are a couple reference lines to pencil in. Note that the column height is divided into thirds and that the lower third’s shaft diameter remains constant while the upper two-thirds curve in gradually – an effect the Greeks called entasis. (As I mentioned earlier, however, at this scale you may want to just render the entasis as a slight taper rather than as a curve.) Also note the use of reference lines: One extends the outside diameter of the shaft above the column while a second extends the outside of the column base below into the pedestal. These lines allow you to step off the horizontal projection of elements in the pedestal and entablature.
Once you’ve established the overall vertical organization, draw in the details of the pedestal. Start by stepping off the vertical organization and then establish the horizontal projection for each part. Most are a function of the module or pulled from an adjacent proportion. Move up to the column and then the entablature.
For certain, you will take a wrong turn or two and have to backtrack and rethink it. It’s all part of learning to see proportionally. When your drawing is completed, you’ll not only have some studies to hang on the shop wall, but you’ll also have created an important mile marker on your journey to becoming an artisan designer.
— MB