Read the other installments in the “Sharpen This” series via this link.
The burr – how to make it and how to remove it – confuses many beginners. Many underestimate its importance. Others disagree on how to remove it.
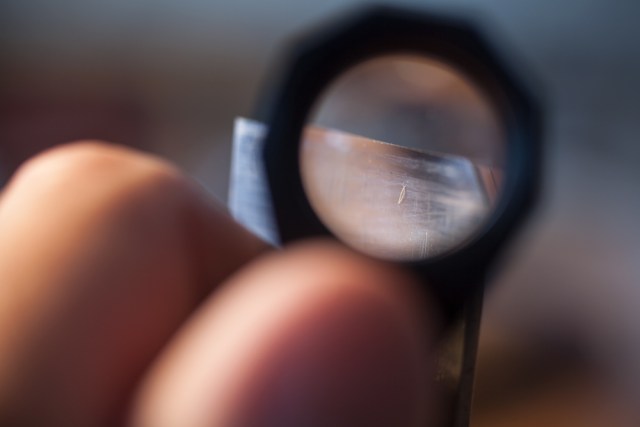
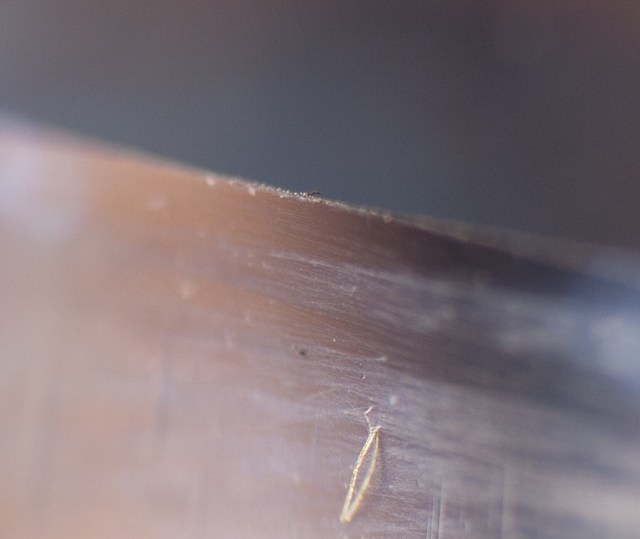
First, what the heck is it? The burr is a tiny curl of metal that appears on your edge when you birth a zero-radius intersection. It’s important because it’s the only practical way to ascertain that you have created a zero-radius intersection and that your edge is ready to polish.
Here is what is important (and not) about the burr:
- The burr needs to exist along the entire edge of the tool. If you have a burr in a few places but not others, you need to rub the edge on your stones until you create a consistent burr.
- If you cannot create a consistent burr, do not polish that edge with finer abrasives. Instead, switch to a coarser sharpening media. The coarser abrasive will quickly remove the dull areas of your edge and give you that consistent burr.
- If you have a consistent burr, don’t worry too much about the scratch pattern on its edge. The scratch pattern becomes more important at the polishing stage (which is the topic of the next entry on this series).
- Don’t try to break off the burr with your fingernail. I have damaged some edges this way, sending me back to the coarse stones to make a new burr.
Once you have a consistent burr, there are several schools of thought on what to do next.
- Leave the burr alone until the very last. Polish the bevel as high as you want to go. Then remove the remnants of the burr using your finest sharpening stone by rubbing the back of your edge against your finest stone. This strategy works quite well.
- Deal with the burr on every stone during your sharpening process. So after you create the burr on your first stone, rub the back of the tool on that first stone to remove the burr. Then move to the next polishing stone. Work the bevel and then work the back on that stone. And so on. Likely you won’t be able to feel a burr created by the finer stones. Work both the bevel and the back on every stone, all the way to your finest stone. This strategy also works quite well.
3. After polishing the bevel, remove the remnants of the burr on the back (you might not be able to feel it) with a non-sharpening media, such as a piece of wood or your palm. This strategy is old school. You rub the bevel and back against your palm. Or you slide the edge through a piece of softwood. No surprise: This strategy works quite well.
Removing the Burr
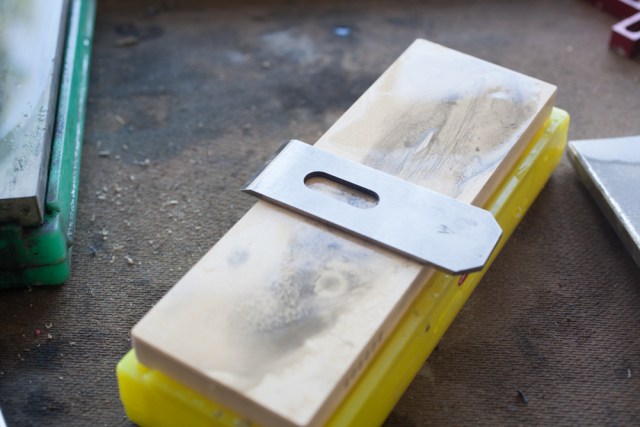
The debate on how to remove the burr has caused a few small wars in the Balkan states. Don’t fall for the fundamentalist talk on the topic. The only “wrong” way to remove the burr is when you use a soft media, such as a waterstone. You can actually mash the burr into the soft surface of the stone, break it off and embed it in the stone.
This is bad because the next time you sharpen, the broken burr will act like a piece of glass sticking out of the asphalt – it will mangle your new edge. This has happened to me. It sucks. (To avoid this problem on soft stones, begin with the back of the tool cantilevered off the stone and then pull it onto the stone. The corner of the stone will remove the burr, preventing it from embedding in the stone.)
So you might remove the burr by putting the tool’s back flat on your polishing stone and moving the tool. That works fine.
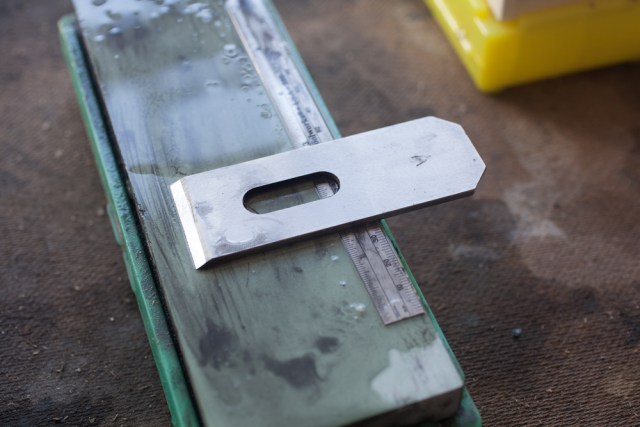
Or you might prop up the back of the blade on a thin ruler so you polish only the tip of the back to remove the burr (people call this David Charlesworth’s “Ruler Trick”). While some will tell you that using the Ruler Trick will make you sterile, reduce your IQ and make toe fungus grow on your face, that’s crap. The Ruler Trick is just another way to remove the burr. It works fine.
I apologize if these entries seem to have the same pattern (you need to do this; how you do it is unimportant). But that’s exactly the same with the burr. You have to create one to get a zero-radius intersection. Then you have to remove it. How you do this is fairly unimportant.
Next up: How to polish an edge and how your particular method is unimportant.
— Christopher Schwarz